Using Cycling Shoes with the MYX Fitness Bike
I have been absolutely loving my MYX Fitness bike. LOVING IT! The workouts are super motivating and it’s one of the best 30 minutes of my day.
Cranking out 500 calories in about 30 minutes is an incredible rush. As a long time road, triathlon, mountain bike and track cyclist, I really didn’t think it was possible to get that good of a workout in that short of a time period.
Another thing I love is the “BOD Cast.” That’s the group of people attending a live workout, whether it’s a MYX Fitness Bike or just a regular workout. The people that register first are on camera with the trainers doing the workout. It’s great to see their faces and watch them working hard.
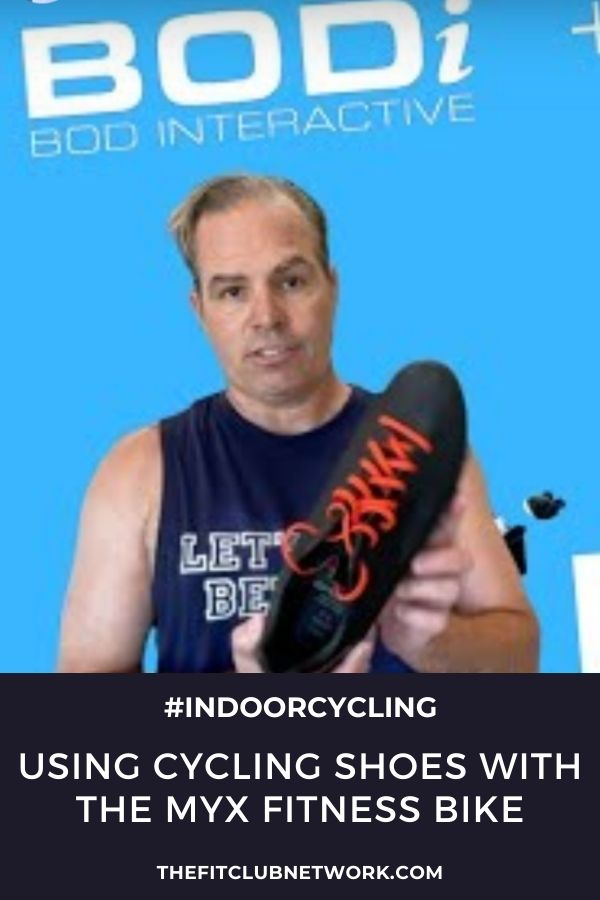
There’s just one little thing…I’ve noticed that most of them are wearing some kind of cross trainer or running shoes.
While that’s perfectly fine and the bike is designed for it, they are really missing out on the full benefits of indoor cycling by not using shoes that have an SPD cleat on the bottom and using the other side of the pedal from the cage. Here’s why…
RELATED | Indoor Cycling to Lose Weight
Think of the pedal stroke on a MYX Fitness Bike like a clock—the area from 12 o’clock at the top to about 5 o’clock is the “power phase” and the one that has the most muscle activity. This is where you are really mashing down on the pedals and creating a lot of power, using primarily your quadricep in the front of your leg.
In order to really get the most out of that power phase, your food needs to be almost flat with just a slight angle of the toe toward the floor at the top of the stroke and, by the time you get to 5 o’clock, it should be pretty flat.
The second phase is from 5 o’clock to about 8 o’clock, when your calf muscle is firing, starting to pull the pedal up to the top of the stroke.
Phase 3 then takes over and your hamstrings pull the pedal up to 12 o’clock where you initiate that power phase all over again.
Ok, so what’s the problem?
Well, as I show in the video, if you are using tennis shoes it’s really hard to properly engage the second phase properly, which makes the third phase a challenge as well.
As a result, most people I see are really just using the power phase and pushing down on the pedals and then allowing the other foot to push them through a dead zone in the stroke.
So, first, it’s not very efficient, but it also doesn’t really give you the best workout because you can’t really use your calf muscles and hamstrings during Phases 2 and 3. They end up pointing their toes to force them into the cage to avoid slipping out and it’s easy for the foot to come loose if they try to engage the pulling motions in Phases 2 and 3.
RELATED | 5 Indoor Cycling Tips to Make It More Fun
When you are clipped into the pedal, you can keep your foot flatter at the top. Then, you can flex your calf at the bottom, after the power phase, and finally you can pull the pedal up to the top where the power phase begins all over again.
Check out the video for more info on what that looks like.
Not only is this a more efficient stroke, leading to a better overall workout, but it helps to avoid repetitive stress injuries from only using the quadricep to push down on the pedals. In addition, it’s just safer and more comfortable. You don’t have to wrestle with the cages, or worry about your foot slipping out.
The cure is simple. Just pick up a pair of indoor cycling shoes or put some SPD cleats on some old cycling shoes if you’ve got a pair already.
If your old shoes have a 3-hole pattern, just reach out to me with the link below and I’ll send you a link to an adapter that I’m using on mine. You can pick up a pair of specially designed indoor cycling shoes for around $100 and it will be well worth it.
Clip in and enjoy the ride. Once you start to feel the power you can generate in Phases 2 and 3, you’ll never go back.
If you have any questions about equipment or things like heart rate training, don’t hesitate to CONTACT ME. I really love this stuff and love helping people achieve their goals and have more fun doing it.


